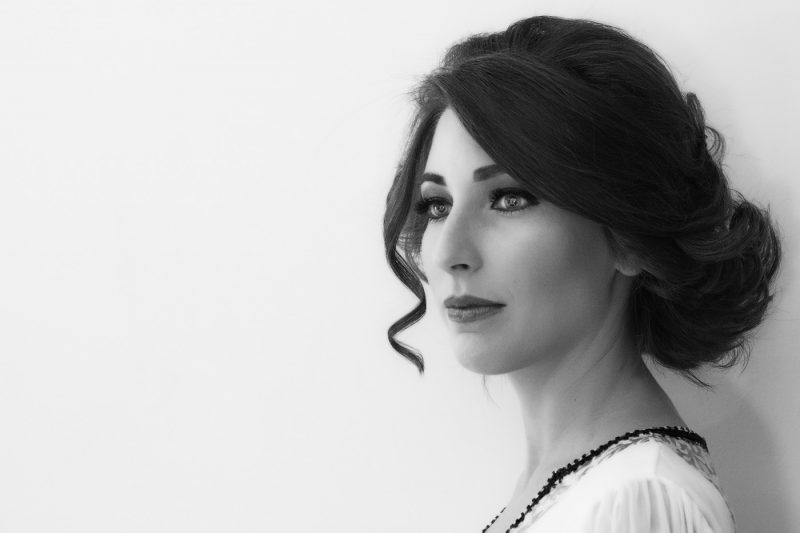
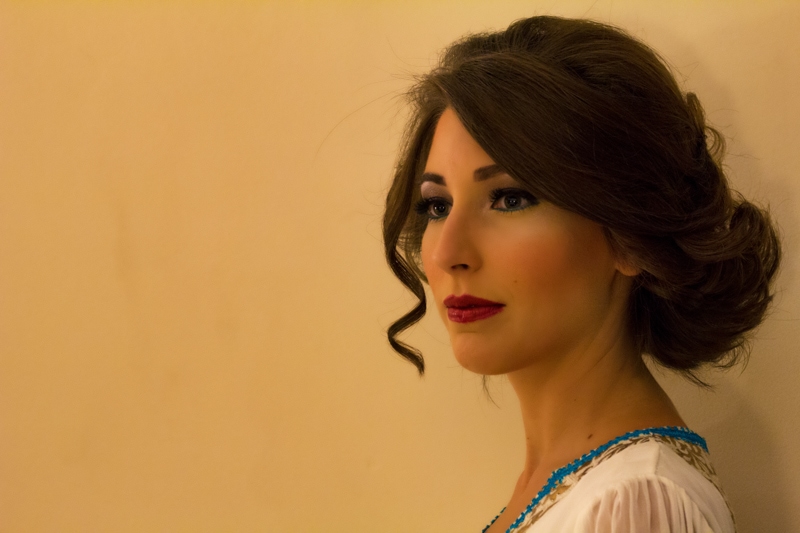
We’ve been spoiled quite a bit so far here in Jordan. Though we have been insanely busy, we’ve definitely had the chance to taste the finer things in life. Rarely do travel photographers get dressed up. So it was nice to have a night on the town. And it was nice for me to be able to play with some portraits and then converting them to black and white in photoshop elements.
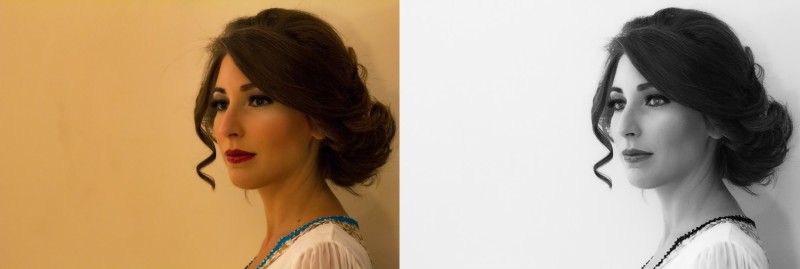
Now, since my flash gear is broken, I had to shoot these images a little grainy, but I hope you can still live with that. This is not some fancy formula I’m about to show you. Instead, I’m basically going to walk you through how I edited this photos to get the before and after you see below.
In the Camera
I can’t really say anything nice about the way I shot this image. I didn’t have much to work with aside from a hot model, a Canon 50mm f/1.8 lens, and a good travel tripod. But I did what I could. I won’t talk about the technical side of how I shot it, because it wasn’t ideal. In a dark hotel room with a broken flash, it couldn’t be. Instead, I’ll point out the composition. Any good portrait needs to somehow tell a story, even if it’s an imagined story. In this image, I wanted Tiffany to be looking off in the distance, because it makes you want to know what she’s looking at so longingly. Also, I used the rule of 2/3rds here because I wanted to leave space for something else to move into the images’ story. Again, the technical side of things is pretty rubbish, but I love the composition.
The Initial Processing
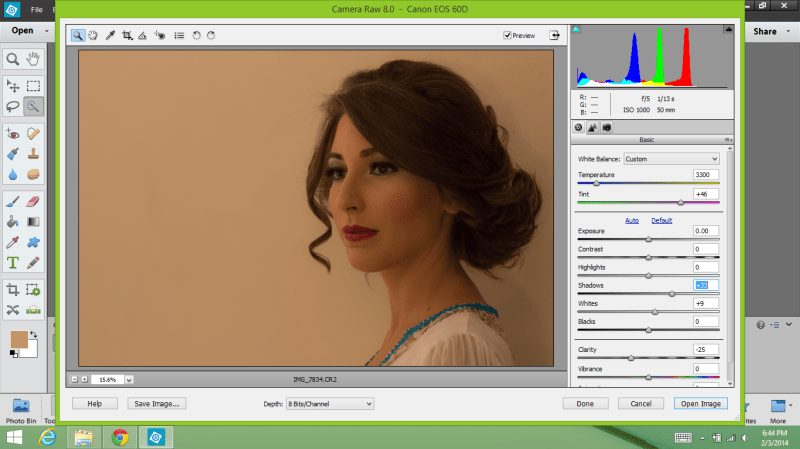
When you bring the RAW file into Photoshop Elements 12, you’ll get your raw editor. Here, you should make some exposure adjustments or maybe tweek the white balance. But it’s not necessary to do much, as we’ll do most of it in the program. For my portrait, though, I’ve reduced the clarity quite a bit. This will make Tiffany’s skin look nice and soft. Don’t go too far with this, or it will make the entire image look soft. I’ve also pulled out some of the shadows to give me a bit more detail to work with.
Making the Portrait Shine in the “Guided Editor”
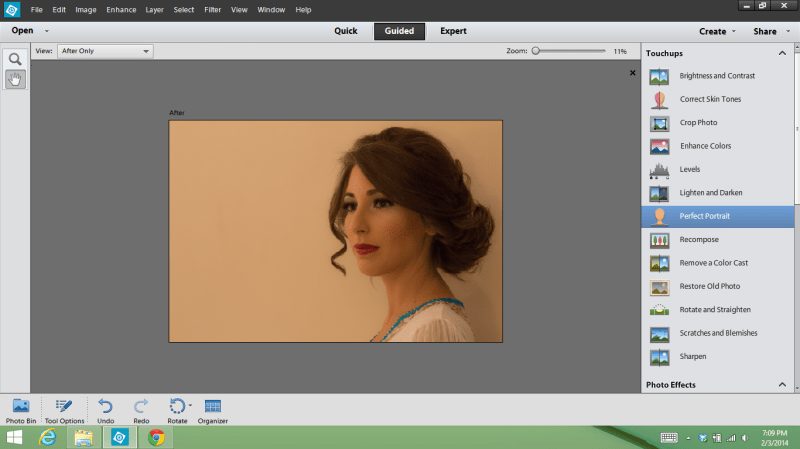
The true beauty of Photoshop Elements 12 is there are options for beginners all the way to expert. Thus, it doesn’t really matter how handy you are with it, you can make some nice edits. Moreover, you can actually jump back and forth between “expert” and the beginner options if you want. To start the edit, I’m going to use the “perfect profile” editing option in “guided” which is great for beginners trying to create cool portraits.
1) Apply Smart Blur: Essentially, smart blur smooths out the face of your subject. By applying smart blur it will soften the skin of your subject. Thus, if you want hard lines and textures in your portrait, don’t use it. If you’re like me, and you’re going for smooth, apply cautiously. Remember that the more you add, the more details you loose. Thus, I usually go with about radius 1.5 and threshold 15. If you want to be more precise, you can then hit “reveal original” and use the blur brush to do the blurring yourself. Or, if the smart blur was good enough, move on.
2) Spot Healing: If your subject has some spots that need to be removed, this is the tool. You’ll see a little cross-hair, and you’ll simple draw on the spots and they will be removed. I’ve removed a mole Tiffany’s neck, but didn’t need to do anything else. Some subjects might need lots of work.
3) Red Eyes: If your subject has red-eyes, you can save it a bit using this feature. I don’t need it.
4) Bright Eyes: One of the most important aspects of a portrait is the eyes. So obviously, you want those eyes to pop. I don’t have any need to use the red-eye editor, but I will use the “brighten eyes” mode. You’ll want to zoom in on the eyes now, and paint the eyes with the round brush. Each time you click, you’ll add another layer of white. Thus, if the eyes are really dark, you might need to pass them over twice. I only had to pass them over one time.
5) Whiten Teeth: Since my portrait has a closed mouth, I won’t go over this. However, I personally believe it’s easier to do in the expert platform, so if you have teeth to whiten, select them using the quick selection tool and then create an adjustment layer where you’ll lower the saturation and increase the lightness. It’s easy to do.
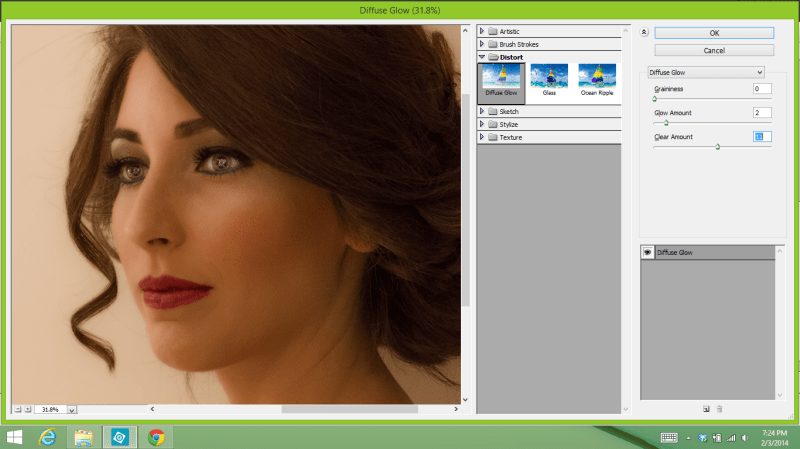
6) Add Glow: If you want your portrait to shine a bit, you can use the glamour glow. Essentially, all this does is bring up the diffuse glow action. You’ll then get to play around with it to chose how you want your portrait to look. I’ve turned graininess to 0, glow to 2, and clear to 11. Obviously, every image is different. The reason I’ve done mine like this is because of the conversion to B&W that I’m planning.
7) Slim Down: The feature for slimming down is more necessary for other types of profiles and body shots. However, in certain cases, it does look nice on headshots too. On this portrait of Tiffany, however, I’m not going to use it. I like the lines of the jaw, and won’t detract from that. If you do use it, however, it’s as simple as pushing the button repeatedly until it’s as slim as you hope.
The Black and White Conversion
Once you have your image set up for your B&W finish you can really do this a number of ways. I’m going to go through the way that gives you the most flexibility. However, if you simply go to Enhance->Convert to Black and White, you’ll have most of these options there. The way I’m going to do it, though, is a two-step process.
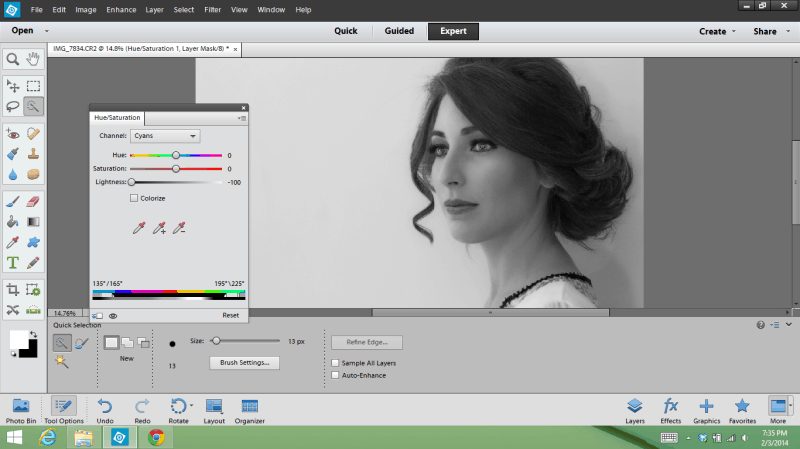
1) Adjust the Saturation and Lightness: First step is to create an adjustment layer by going layer->new adjustment layer->hue/saturation. Here you’re going to have the opportunity to mess around with the different colour levels and play with their lightness. First, in the master channel, reduce the saturation to -100. Then go into each of the colour channels and mess around with the lightness until you’re somewhere you’re happy with. We move onto brightness and contrast next, so don’t stress if that aspect isn’t there yet.
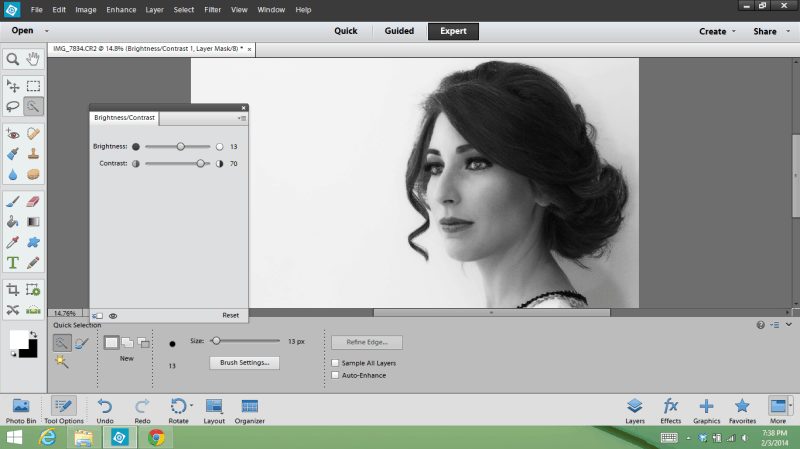
2) Adjust the Contrast and Brightness: Same step as the saturation. Layer->new adjustment layer->brightness/contrast. From there, you can play around with the image until you get it the way you’d like.
Voila
By now, you should have your image! Note that there’s a chance that you’ll need to brush out some unwanted shadows. I left my shadows in the image, mostly out of laziness, but also because that’s another lesson for another day.
I’ll be checking in with another Photoshop Elements 12 tutorial in the next week or so. I’ll be showing you how to edit star photography to get the best out of the images you take. Stay tuned.


