My feet have felt extra itchy of late, and I know what did it to me. It was that bloody adventure across the Darien Gap. The truth is that before I left I was very much ready to get back to Medellin; to see my friends, get some work done, launch my travel magazine and relax. But that adventure across the Darien fed my sense of adventure like it was my first trip ever. I know, I sound like a junkie trying to come down off a high, and maybe I am.
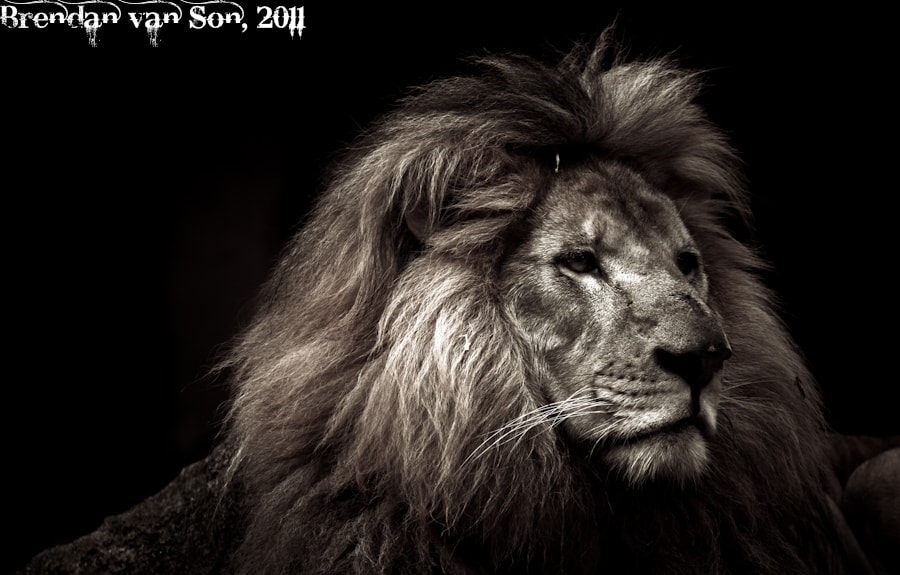
Anyways, over the month or so I’ve been planning my future travel adventures. As I head to the Galapagos in a couple weeks I’ll essentially be checking off the last bit of my South America checklist. I will have spent two and a half years on this continent soon. However, I think it’s time for a little Africa. What do you think? I’m considering starting in the early spring a three year loop of Africa starting and ending in Morocco touching every country I can along the way. How serious am I? Well, let’s just say that I’ve already bought backpacker’s travel insurance that will cover me through ANY adventure. Heck, I even went to the zoo to check out some of the potential animals I might see. And let me tell you if I can get a photo like this one that I shot below in the wild, the entire 3 year adventure would be more than worth it. Read below for the info on how I got this shot.

How I Got the Photo
Photographers love to tell you that it’s better to get something in the camera than in the post processing and that’s so true. In the case of the shot above I was fairly luck as well. The lion had actually stepped into a light area while a shaded area was directly behind him acting, essentially, like a black piece of velvet would for a studio photographer. Of course that background wasn’t perfect and some adjustments had to be made in the post processing which I did in Photoshop Elements 3.
The first thing I did was add a touch of blacks to make the background as clean as I could. I played with the levels to bring out the lion and to darken the background. My data was Highlights = +100 (I wanted to add texture and contrast to the lion’s face). Lights = +60 (this lightens the face of the lion), Darks = -12 (this darken the background), Shadows = -52 (this completely blacken the background and gives contrast on the face to the highlights). After that it was all about creating a black and white look. What I did was dropped the saturation and vibrance down (but not all the way since I wanted the yellow to have a hint of gold still). I also warmed the temperature to 16000 to give the warm look on the face. I then boosted the contrast (to create that texture between light and dark on the face), and also boosted the clarity to really distinguish the hairs on his face.
The end result is a very majestic looking Lion isn’t it?
For the photography junkies I shot this on a 70-200mm f/4 at 200mm, f/4 and 1/30 seconds. ISO 100.
