I get asked so often about how I made certain images. The truth is, that the technical side of photography is so important. Without the technical side, it’s impossible to create your art. Essentially, it would be like trying to paint without a brush. Thus, I’ve decided to let you in on a couple of those images from my recent trip to Turkey, of which I spent lots of my time shooting images.
Blue Mosque HDR
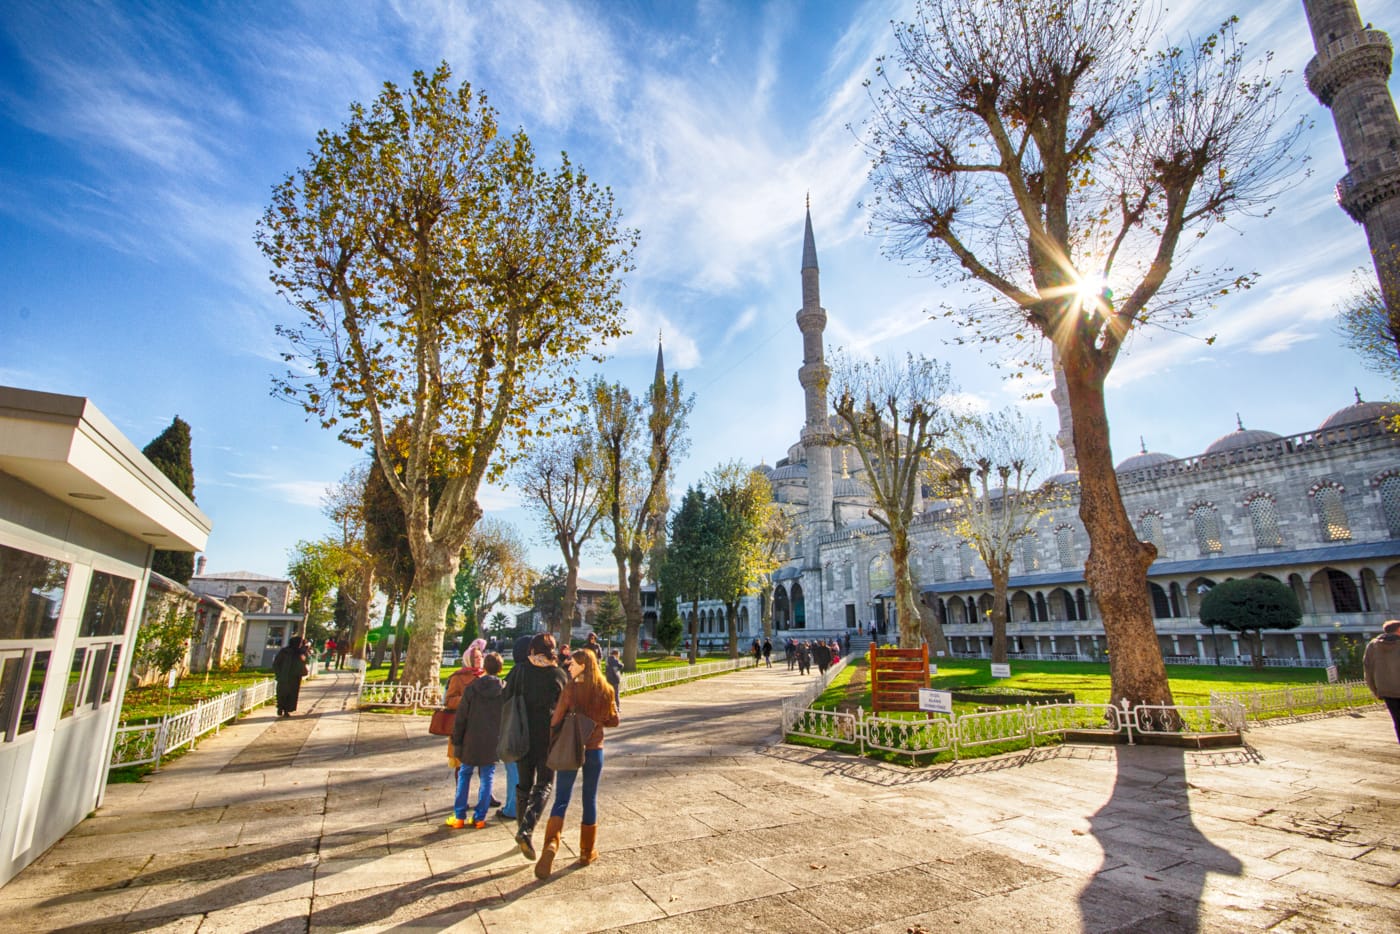
The first image is of the courtyard of the Blue Mosque. Now the Blue Mosque is as classic a view in Istanbul. People often plan their entire trips to Turkey based on this mosque. Thus capturing it is essential for travel photographers.
With this image, I wanted to something a little bit different than the usual Blue Mosque image. I wanted this photo to show the courtyard which is stunning. To really bring out the colours I did an HDR photo processed in Photoshop Elements. But to simply say I shot this image HDR and be done with it, doesn’t actually help. I shot this photo at f/16 because I wanted to turn that light behind the tree into a star.
The higher the f-stop, the more narrow the whole allowing light to your sensor is. Thus, it’s kind of like if you were to look at a lightbulb and squint. You’ll see the light star in your eyes. For me, that was really what made this image. If I had shot it at f/5.6 or f/4 that sun would have just looked like a giant blob of light in the sky. If you want to star streetlights, the sun, the moon, any light source, use a high f/stop like f/11 – f/16
Blue Mosque Dusk
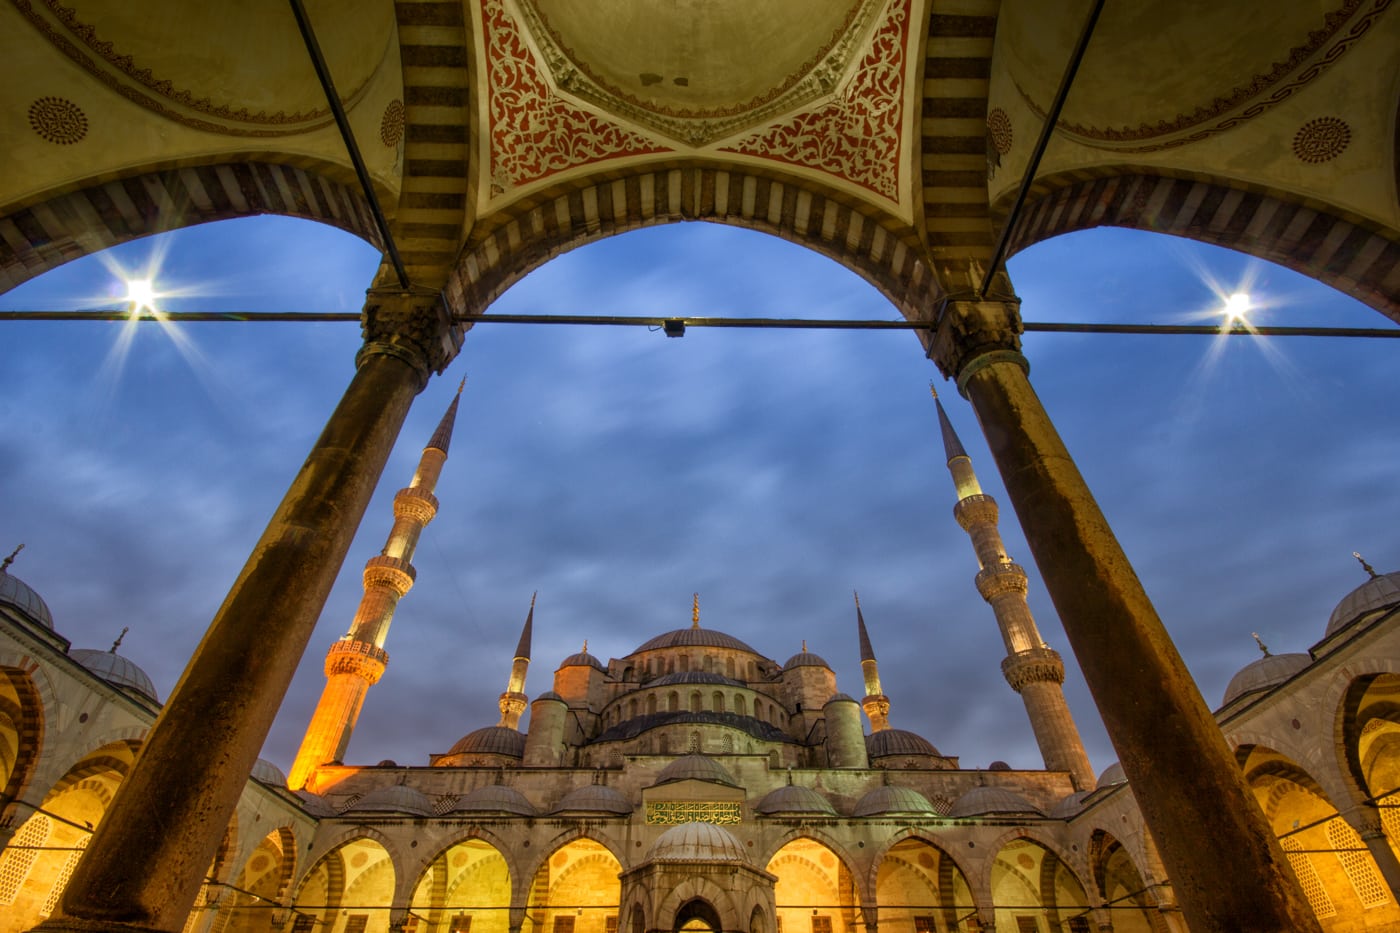
Though this is the same building, as you can see, this and the previous photo of the Blue Mosque are completely different images, not only in subject but how they were shot. This is the much more classic photo of the Blue Mosque that people see in their travel brochures for Turkey.
To get this image to look like this, it’s all about shooting the right light at the right time of day. For me, the blue hour, which usually starts about 20-30 minutes after sunset is the best time to photograph architecture. The sky is full of colour, for one, and it’s also dark enough that you won’t be dealing with shadows. As a bonus, you’ll also often get buildings to light their buildings up.
Technically, it’s all about controlling the elements. I again shot this image at f/16 so that the lights at the top of the image would star and not cause lens flare. The shutter exposed for 8 seconds which was short enough that the clouds wouldn’t have moved too much and still show lots of definition. Had I shot 30 seconds, they may have looked either more wispy, or like blobs. The focal length comes down to my composition choice. I wanted to frame the mosque under the arches which obviously required the super-wide 10mm (or 15mm full-frame equivalent).
Istanbul Vendor
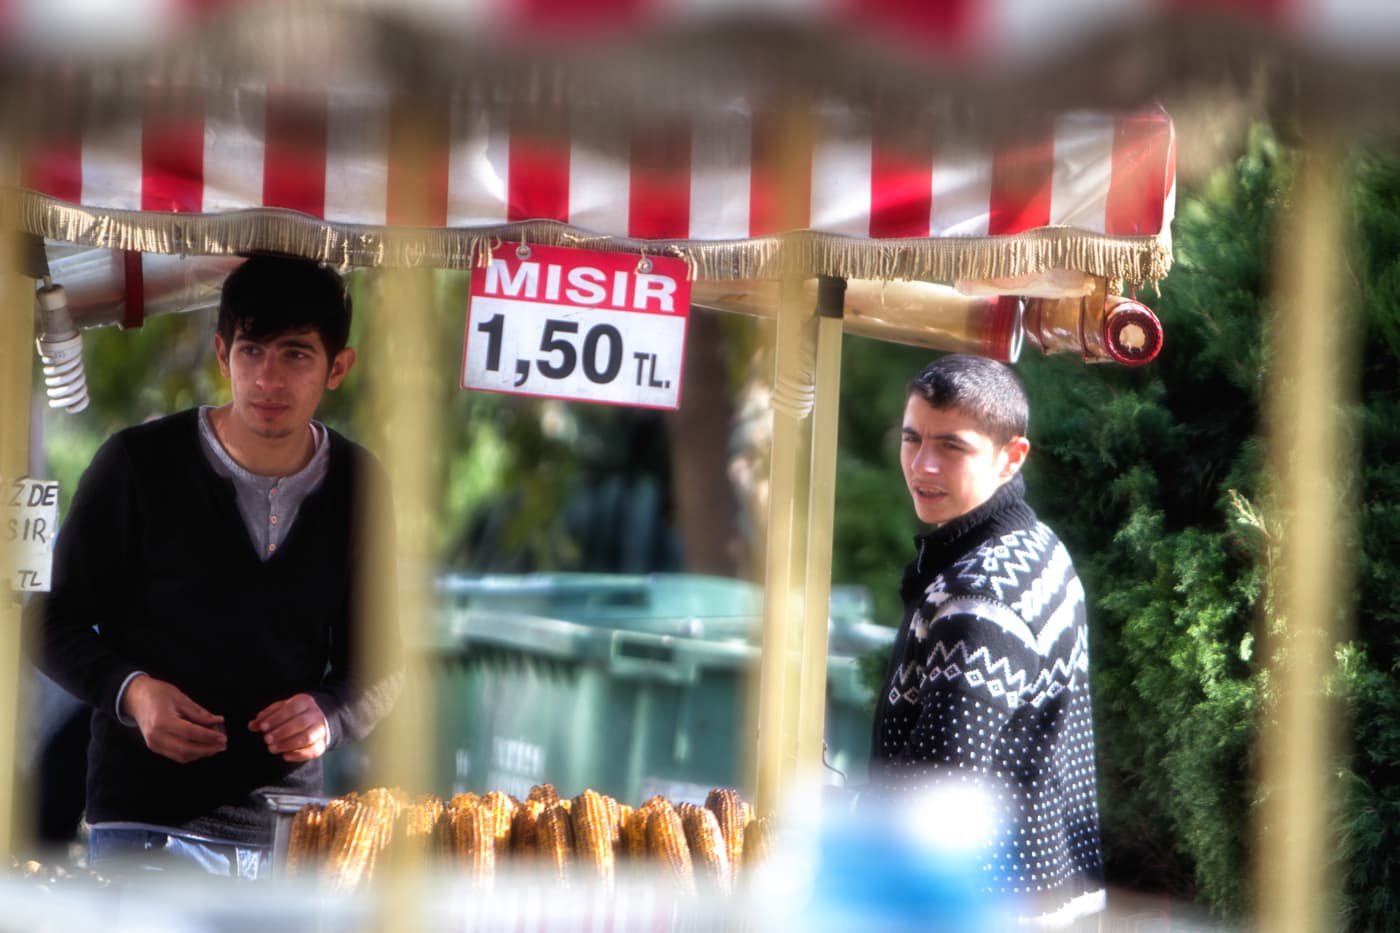
I can’t explain how important it is to capture the human element of life in travel photography. Though photos of places like the Blue Mosque might resonate most with people you show the photos to, it’s the shots of the people that will make you remember the destination most. And, we have to remember that we take photos for ourselves first and foremost.
The composition to this photo of the corn vendor in Istanbul was another bit of framing, but it wouldn’t have worked had the technical side not been correct. I really set the shot up to focus on the vender. To do that, I had to shoot a low aperture of f/2.8 in order to blur the rest of the image and create lines that weren’t too harsh. Shooting the 70-200mm f/2.8 lens, I shot this image at 175mm. The general rule of thumb for shutter speed is that you should match it to the focal length. Thus at 1/320 seconds, I was ok. That being said, this lens has such a good image stabilization system, I’ve been able to shoot about 1/60 seconds and still pull sharp images.